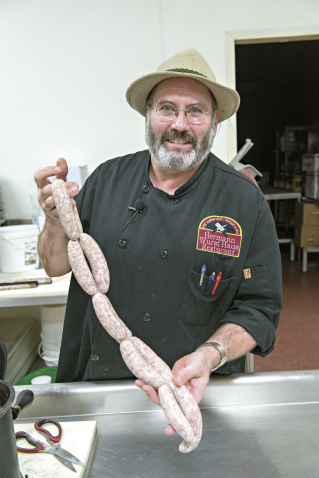
Making Sausage Like a Pro
Posted by Patty Held on 30th Oct 2015

Making sausage at home can be a fun and rewarding experience. This process takes a bit of special equipment and knowledge.
To prepare you will need:
- meat grinder
- sausage stuffer attachment
- sausage casings
- meat
Grinding it out:
Buying ground meat is obviously convenient. However, grinding meat at home can provide more control over the exact cuts of meat in your mix. The old-school hand crank is readily available and costs under $30. As you pick cuts to incorporate into your grind, aim for at least 20 percent fat. While going lean may be tempting, remember fat is full of flavor! The meat grinder, hand cranked or motorized, grinds as a cross-shaped blade rotates against a perforated metal plate. This can be its own piece of equipment, or work as an attachment on another appliance such as a KitchenAid mixer. While most folks have a good processor at home, this machine tends to tear and mash the meat which can create a mushy texture that is uneven. If it is the best option available, make sure to pre-chop the meat into 1 inch squares and fill the processor bowl 1/4 full.
Prep Your Casing
Casings are available at butcher shops, ethnic markets and some grocery stores. It is best to start with large bore hog casings, not the smaller sheep casings, which are more prone to break. The small casings take more time and can make sausage making frustrating from the start. To prep the casing, soak in cold water for 1 hour. Change the water periodically. Drain, then pull one side of the casing over the faucet and let the cold water gently rinse the casing for 5 minutes.
Stuff the Sausage with a Meat Grinder
Attach the sausage stuffing tube attachment to your grinder and fill with the meat mixture. Take the casing off of the faucet and gather it onto the nozzle of the stuffer, similarly to how a woman would gather a stocking before putting it on. Knot the last 2 to 3 inches left dangling from the nozzle. Begin pumping the handle or turning the crank so that the meat begins tightly filling the casing, be careful not to burst the casing by overfilling. After every 4-6 inches, twist the casing a few times to form the individual brats. When you reach the end of the casing, tie another knot or use a small piece of string to finish it off. If you see small air pockets along the casing, they can be deflated with a sharp needle.
Stuff the Sausage Using a Piping Bag
Using a piping bag takes more time and can be somewhat awkward at first, but if you just want to try sausage making, this can be a good jumping in point. Remove the casing from the faucet and cut it into 20 inch lengths. After knotting one end of the casing, you can prepare a large piping bag by fitting it with a 1/2 inch tip and filling it with meat. Feed the open end of the casing over the tip and gather it on the tip. Using one hand to squeeze the bag and the other to hold the casing, refill the bag as needed. As explained above, partition the casing into sausages and tie off the end.

